1. Context and introduction
This is the second in a series of 4 posts, where I delve into planning the interior design of your house from a layman’s / customer’s perspective.
This post focuses on space planning, building draft designs and selecting a theme for your house. It is not about aesthetics like looks, colour or home décor. Rather, it’s about a structured approach to planning the interior-design exercise itself, ensuring that you’ve asked the right questions, assessed your needs, understood pros and cons of different alternatives, budgeted prudently and designed your house in a way that’s optimally suited to your needs and lifestyle.
The home interior design planning process (HIDPP) structures the home interior design exercise into a 9-step process, each with its own objectives, pre-requisites and outcomes.
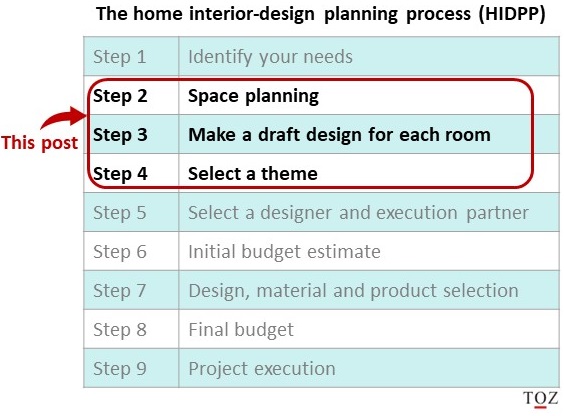
I covered step 1 on identifying your needs in the previous post. This post is about steps 2, 3 and 4.
2. Step 2 – Space planning
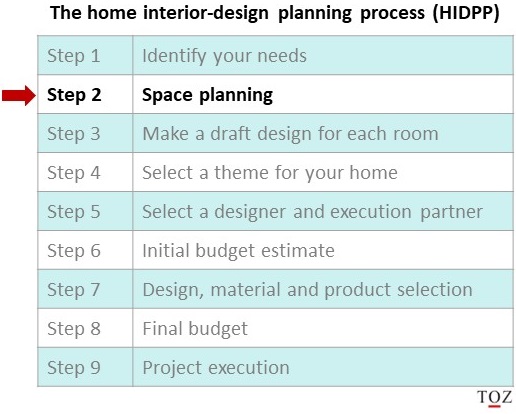
By the end of this step, you would have:
- a thorough understanding of the space constraints of your house.
- 3-4 layout options of your house with space allocated for different activities, furniture and appliances.
- identified categories of items to be stored in each piece of furniture that’s meant for storage.
In the interior designing world, space planning is a complex exercise that needs professional skills; what we will do here is a simpler version of it, which should ensure that you don’t make any major mistakes, and you’re better prepared to engage with your designer and execution partners.
Keep in mind that space planning is an iterative process, so you don’t need to come up with the final layout at the first go. It will take a few revisions to arrive at a final layout.
Pre-requisites for space planning
Before getting into space planning, you should have identified your needs in step 1 that we discussed in the previous post. You should have an exhaustive list of all your needs prioritised and categorised into must-haves and nice-to-haves.
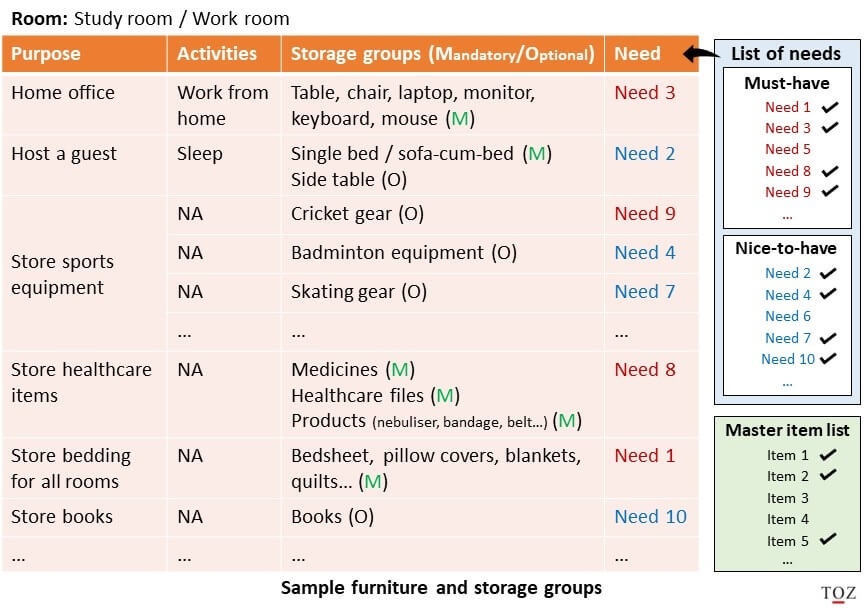
2.1 Identify furniture and storage groups
Begin this exercise by considering each room separately, after which you can look at all of them together.
For each room:
- Start with the purpose of the room and list out all the activities that will take place in that room. For example, a bedroom could also be used as a study, for attending meetings or for some kid’s activity.
- Next, identify the main furniture items based on the above activities. For instance, the master bedroom may need a bed, wardrobe, dressing table (or a similar setup) and a study table with a chair. Don’t get into the placement of items as yet, just list them out.
- Now list down all the storage groups you will keep in each room, be it inside a wardrobe, cabinet, open shelf or even on top of a table. No need to decide on the placement inside the furniture as yet, a list of storage groups/items is fine for now.
One easy way to make sure you have covered all possible storage groups/items is to make a master list from your existing house and check them off as you allocate space for them in each room.
- Mandatory vs optional groups – Identify which storage groups need to be in that room come what may, as opposed to those that you could consider keeping elsewhere in the house. This exercise will help you prioritise subsequently, in case you are forced to choose between storage groups due to limited space.
- Estimate how each storage group would grow over time and allocate space accordingly in different furniture pieces. This may feel a bit tedious, but it ensures that you subsequently have the right furniture in the room, as well as the right balance of hanging rods, shelves, drawers and accessories within your furniture.
Repeat the above 5 steps for every room.
Once you’ve covered all rooms, tally with your list of needs from step 1 and check if you have covered all the must-haves. If not, allocate the remaining ones in some room. It’s ok if all the nice-to-haves are not covered as of now; you can address them later as you refine your layout and design.
Plan for storing as many things inside a wardrobe or cupboard rather than an open shelf or table. Anything kept outside will gather dust and would need to be cleaned regularly. It’s also easier to clean a surface that has fewer items on it.
2.2 Arrive at potential layouts
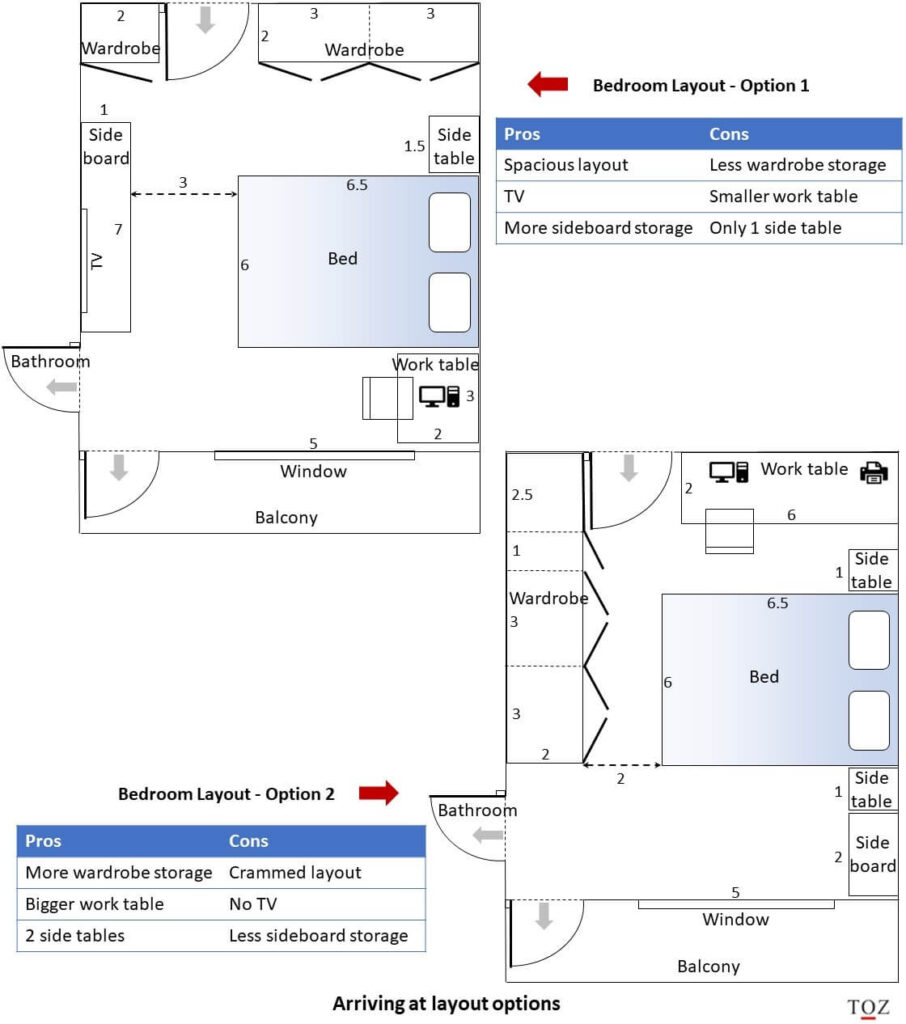
In this step, we identify space and configuration constraints, and create different possible layouts of each room in terms of where different furniture items can be placed.
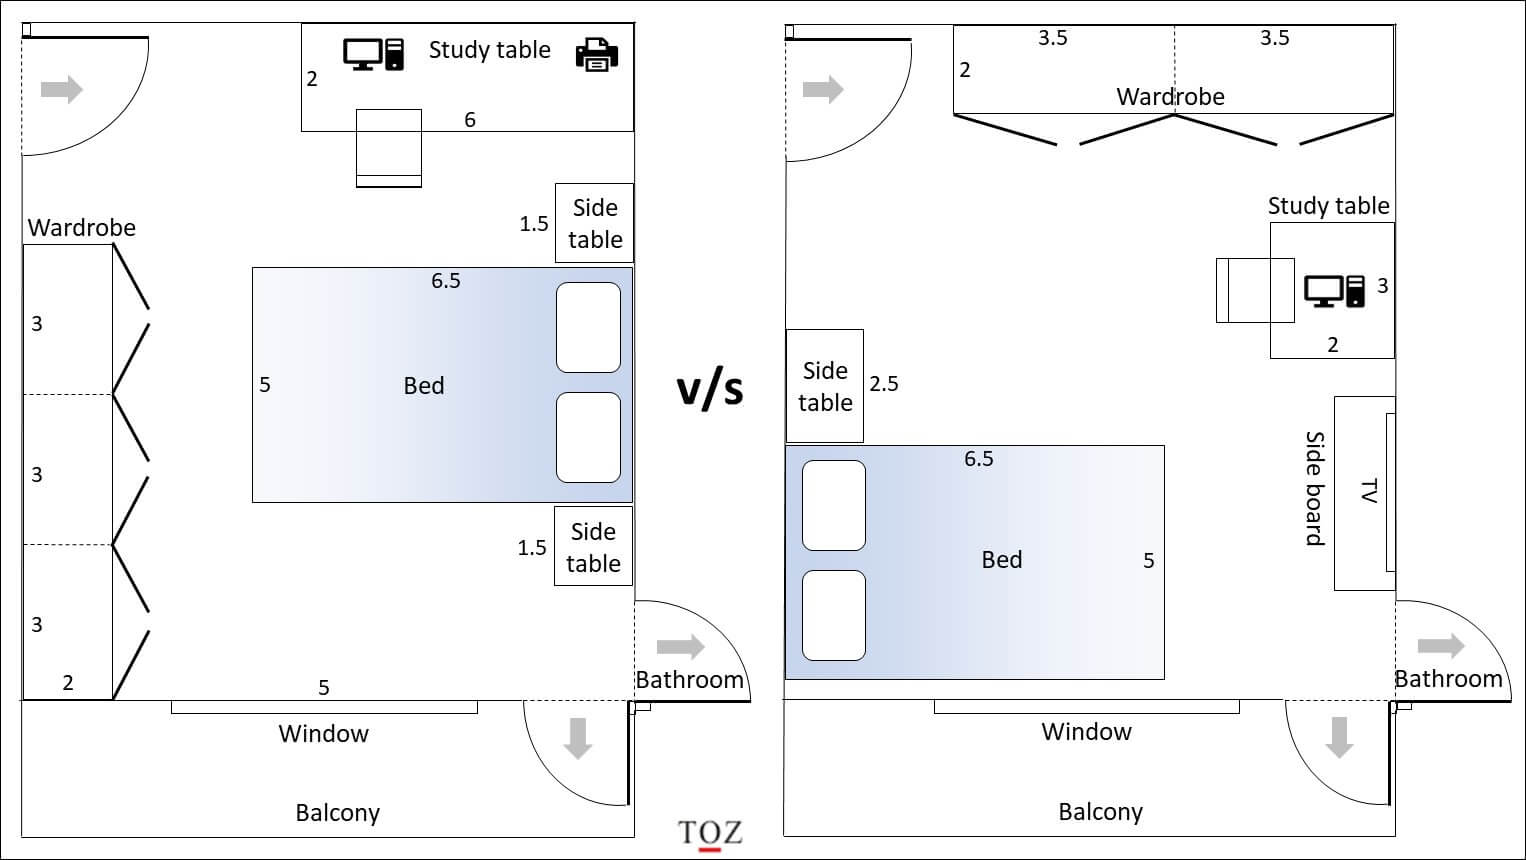
Measure the dimensions of each room including that of doors and windows. Draw it on a piece of paper. If you like, you can draw it on your tablet or computer as well; just make sure you don’t opt for something that’s too time-consuming.
Before you start, get to know your neighbours. They will be able to give you useful inputs on what it’s like to practically live there – how windy does it get, which rooms are warmer, noise levels in each room, level of direct sunlight at different times of the year. Such insights can prove to be valuable in designing your layout and selecting the right fittings and accessories. For instance, you may want to have your study in a room with lower noise levels and select the thickness of curtains based on the amount of light each room gets.
Personal experience:
Our neighbours gave us some excellent suggestions when we were designing our house. They suggested getting reinforced door stoppers for 2 specific doors, as it tends to get really windy here at times and the door-frames crack after a few years due the continuous slamming of doors. We had initially decided to have a study along a particular wall in one of our rooms, but after speaking to our neighbours, we decided to place it along another wall, as it would be more comfortable out there during summer.
Consider each room individually and arrive at potential layouts.
- With the storage group/item list, estimate the size of storage needed. For example, based on the number of things you plan to store in a bedroom, you will need to estimate how big a wardrobe you will need. Would a 6-feet wardrobe be fine? Or would you need an 8-feet one? Or should you split them across 2 wardrobes and a sideboard? Write down the options. You don’t need to be accurate in terms of the size of wardrobes, a rough estimate is fine for now.
- Next, come up with a potential placement of each furniture item in the room. This is a tough step, as you will need to balance a lot of factors and constrains. For example, you would need to consider natural light, Vastu (in case you follow it), religious considerations, size of furniture, and ease of navigating the room. Write down or draw potential layouts of the room. If you can’t fit everything, its ok, just note down what’s getting missed.
Try to place the wardrobe on the side of the bed. Having it in front (near the foot) might feel imposing, especially if you intend to have one of those tall wardrobes that extend from the floor to the ceiling.
Now repeat the above 2 steps for every room.
This would be the end of your first iteration.
2.3 Iterate to optimise the layouts
Now consider all rooms together and iterate all the above steps.
In each iteration, see how you can address all storage groups as well as the remaining nice-to-haves from your list of needs. As you go through the iterations, you will be faced with different possibilities. For example:
- Moving storage groups across rooms and accordingly varying the size of wardrobes and cupboards.
- One big wardrobe vs 2 or more small wardrobes.
- A mix of wardrobes, cupboards, sideboards and other furniture.
- Queen size bed with bedside tables, or a king size bed with headboard storage.
- Re-assessing the purpose of different rooms.
- Re-prioritising some storage groups. Questioning whether certain storage groups/items are at all needed.
We all inevitably tend to hoard a lot of things over the years. This step is a good time to assess them. If it doesn’t make sense to keep some of things, get rid of them right away.
At the end of this, you would arrive at 3-4 layout options for each room of your house.
2.4 Sanity check
It’s possible that you may miss out on some items while going through the iterations for different rooms. So do a quick sanity check on the layout of each room:
- It should align with the purpose and respective activities of that room.
- Related items should be in the same room (You don’t want shirts in one room and trousers in the other).
- Direction of lighting should be appropriate for activities.
- Room should not feel too crammed, there should be enough place to walk around.
- It should align to Vastu or any other religious needs (in case you follow them).
Every room should be easy to navigate. Consider a path having a width of atleast 2.5 – 3 feet for a person to comfortably walk in the room.
Outcome of Step 2
3-4 potential layout options for each room of your house.
Wrapping up step 2
Space planning is quite an intense activity given that you have to juggle several factors. I would recommend doing this exercise over several days. Looking at it afresh the next day sometimes helps to see things you were missing earlier.
Also keep in mind that you don’t need to arrive at a final layout at this point. In fact, even after you complete it, you will have several ideas and layouts popping into your mind over the next few weeks, and that’s ok. It’s also possible that your designer may subsequently come up with a very different idea. The layout may also change later based on the dimensions of a specific furniture item or appliance you may buy later. But this still is a valuable exercise as:
- it gives you a good understanding of your space constrains.
- it really makes you re-think a lot of your needs and sometimes may lead you to prioritise them differently.
- having tried different layout configurations yourself, you are much better prepared to evaluate a different layout suggested by your designer or anyone else.
Armed with layout options and a thorough understanding of your space, you are now ready to move to step 3 of the home interior design planning process.
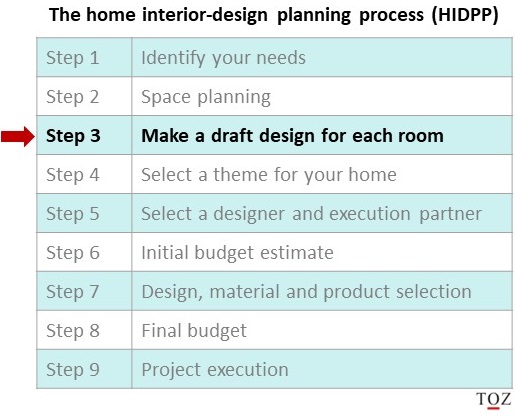
3. Step 3 – Make a draft design for each room
This step delves a level deeper into each room and its furniture items, to understand the design/selection considerations to be kept in mind for each of them, so that it adequately caters to your specific needs.
By the end of this step, you would have:
- figured out what you definitely want or don’t want in different pieces of furniture in terms of design, build material and features.
- identified potential customisations or features in furniture items that could add convenience to your daily life.
- created a draft design of furniture based on key design considerations.
- understood the pros and cons of different materials and coatings, and figured out which ones are ideal for different kinds of furniture.
- identified the right models of appliances, electrical fittings, sanitaryware and other hardware that suit your needs as well as gel with the rest of your house.
- be better equipped to decide between buying readymade furniture versus getting them custom-made.
There might be instances where you might realise that you need to switch to a different layout. This step ensures that you are not only better informed to make that call, but also in a position to make the switch rather easily if you have to.
Prerequisites for this step
Having completed space planning in step 2, you would now be ready with a few layout options for your house. Pick the one you like best and proceed into this step.
Given below is a list of topics you should consider one at a time and then the related ones together. Each post is a detailed guide that talks about one or more of the following:
- what to keep in mind when designing a room or a particular furniture item.
- the pros and cons of different materials and coatings.
- make vs buy decisions – getting furniture custom-made or buying readymade ones from a store.
- how to go about selecting different appliances – which features are crucial and which ones are just marketing gimmicks.
- how to select electrical fittings, sanitaryware and other hardware for your house.
Maintaining your furniture can become quite painful over time. It could be about re-polishing surfaces, specialised cleaning or getting rid of scratches. Always keep the maintenance angle in mind while designing your house. For instance, veneer and duco paint are visually appealing, but difficult to maintain as they get scratched easily. So you are better off not using them for a high usage table top.
As I write posts on each of these topics, I will update the links below:
Design and material considerations for cabinets, shutters, drawers, countertop, splashback, fittings and sink. Also details out a structured approach to designing your kitchen.
A deep dive into each of these products, the options available and key factors you should consider when selecting each of them.
A comparison of all these products and how to identify which one is best suited for you. Also provides a buying guide for a microwave oven.
9 factors to consider when buying one.
Build material options, pros and cons of different shutter options, designing wardrobe internals, buy a readymade wardrobe vs getting one custom-made.
6 aspects to consider when designing a bed or selecting one at a store.
Types of mattresses, 9 factors to keep in mind when selecting a mattress, some pointers on maintaining your mattress for better longevity.
This would be useful if you’re looking for a quiet fan (say, while attending meetings when working from home). The post guides you on how to select such a fan that also consumes less power.
8 aspects to consider when setting up a home office, such as the right chair, table, footrest, electrical points, lighting, storage and computer setup.
An about an objective approach to home lighting design in terms of understanding lighting layers, wattages, design techniques, efficiency and smart lighting.
A look at different washing machines designs, their pros and cons and what factors and features to keep an eye out for, when selecting one.
- Designing a convenient bathroom
- Designing balconies
- Curtains and blinds
- Wallpaint vs Wallpaper
Personal experience:
My wife and I are not among those who find regular home-cleaning therapeutic. So when we were getting our home interiors done, we actively endeavoured to keep horizontal open surfaces to a minimum, as they tend to collect dust. For every horizontal surface, we questioned if it was absolutely necessary to have it, and if yes, we ensured we used scratch resistant material on the surface. This meant, fewer side tables, no showcases (not a fan of it anyways) and no additional shelves solely for displaying decorative items. We kept this in mind even when planning the lights. Today dusting the entire house takes less than 5 minutes.
Outcome of Step 3
A detailed layout of each room, specifications of furniture (sizing, preferred materials, finishes, coatings, etc.) and shortlist of appliances (brands with model numbers and prices).
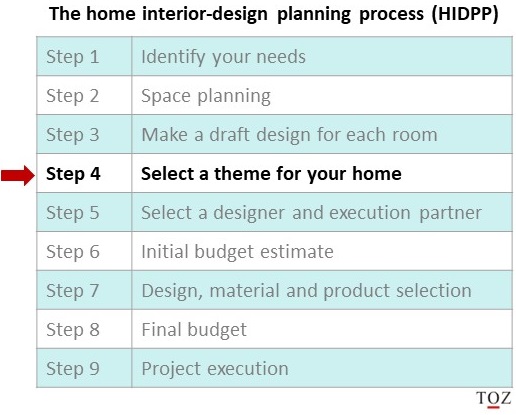
4. Step 4 – Select a theme for your home
Up until now, our focus has been on functional aspects of furniture, fittings and appliances. We focussed on sturdiness, durability, efficiency, maintainability, reliability, convenience and a whole lot of other factors, except aesthetics.
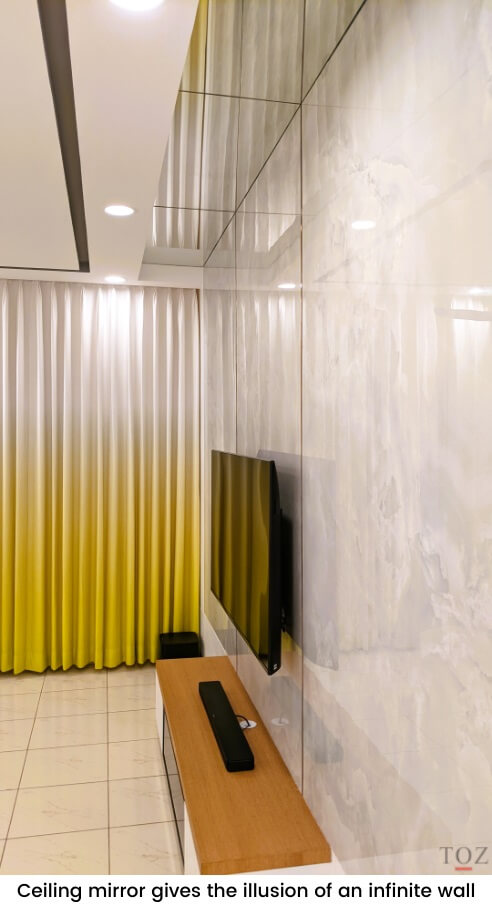
One key aspect that contributes to the look and feel of the house is the theme you select. The theme becomes a guide for the colours you choose, finishes you select and the kind of decor have in your home. This will be an important input for your interior designer.
Looks appeal to our emotions, they cannot be quantified and hence we can easily get swayed into making poor decisions based on just looks (just like in other aspects of life 😊). That’s the reason I held back theme selection until now.
Choose a theme that represents you – your personality, interests and style.
There are plenty of themes out there for you to select from. There’s traditional, modern, minimalist, rustic, contemporary, industrial, bohemian, eclectic, just to name a few. The internet is filled with info and pictures on different themes. Pinterest is a good starting point.
As for me, I am not much of an artistic person and not good with colours either. Luckily, my wife has a design background; so she took care of all the aesthetics of our home. I didn’t have to bother about it at all. 😊
Ensure that you shortlist the looks / colours you like and also anything you would definitely want to avoid. For instance, we were keen on white interiors and were very clear that we did not want curvaceous looking furniture with intricate detailing (we were bored of that look since that’s what we’d been seeing since childhood).
5. Conclusion
The benefit of completing steps 1-4 is that it gives you tremendous clarity in terms of your needs, the space available, what’s feasible and what’s not, what you’d want to spend more on, what materials you would prefer, etc. This knowledge would not only give you a lot confidence, but also put you on the right footing when engaging with your designer and negotiating a contract.
Have questions or queries?
There are some pertinent queries that other readers have asked in the comments section at the end of this page; do go through them to see if any of them resonate with you. If you have a different question, feel free to mention it there; I will do my best to answer it. Please allow a few days for me to respond. If I (or any other reader) can answer it, then good. If not, atleast it will be something for the next reader to keep in mind. In case you have any learnings or experience to share, do mention it there for the benefit of other readers.
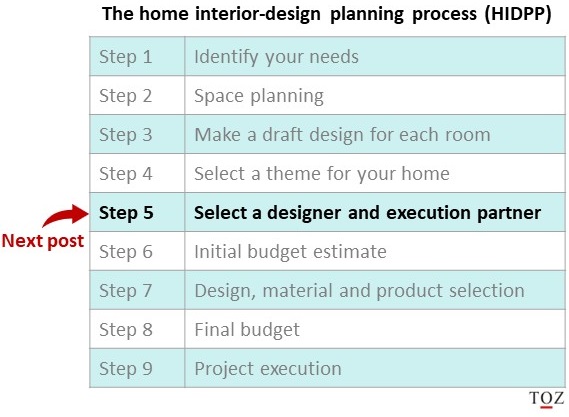
In the next post, we continue into step 5 of the home interior design planning process, where we look at how to select the right interior-designer and execution partner. The post explores the types of interior designers, their pros and cons and what to keep in mind when selecting one.
Share this post:


Hi Pradip, when planning a room, I usually draw the the room layout (with doors and windows) on paper (scale 1:20 or whatever fits), then cut the pieces of furniture from paper using the same scale and start moving it around to see what space I would have left and where. Do you know any better solution to that? Thank you.
Though I used pencil and paper to draw the layouts, I think your approach is actually much better, since it’s easier to move the pieces around than draw a new layout each time. And it would be fun for the kids too.
Since a layout is more like a schematic diagram, Canva would be a good option and should be sufficient for this purpose. It’s free and very easy to use. Alternately you can even use powerpoint as it allows you to type in the sizes of blocks. It’s not the best option, but I know plenty of people out there who would be comfortable with this :-).
Most of the professional designing softwares like Autocad are expensive. There are a few free cloud based apps like floorplanner that have many features and even create 3D visualisations, but I found it a bit tedious to use them. Having said that, I admit I didn’t try too hard to learn them either, since I knew at the back of my mind that my designer was anyways going to create an accurate version on Autocad. If you plan to do the detailed design yourself and not hire a designer, you could consider using them.
I have checked Cenva, and Autocad (definity out of “my league”), and have concluded to stick to pen, paper and sizers. Appreciate your help and confirms my theory that going simple maybe a pretty good option if you are not the business owner.
Thank you Pradip, I appreciate what are you doing. It is very helpful to consult those topics with an independent expert such as yourself.
Thanks Vojtech 🙂