
1. Context and introduction
This is the last of a series of 4 posts, that explains how to plan the interior design of your home from a layman’s perspective. It’s not about aesthetics (looks, colours or home décor). Rather, it focuses on a systematic approach to planning the overall interior-design exercise by asking the right questions, assessing your needs, weighing the pros and cons of alternatives, selecting appropriate materials and products, budgeting prudently and designing your home in a way that optimally addresses your needs. This post is about building an interior design budget, finalising the design and creating an execution plan.
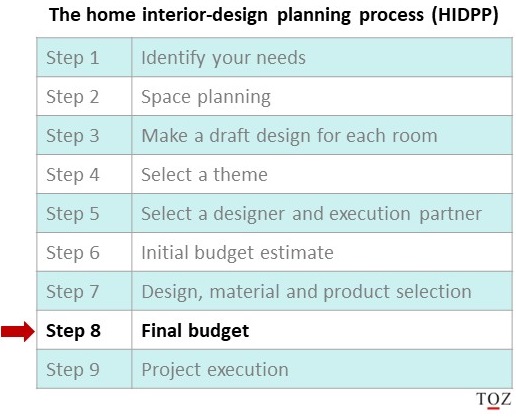
The home interior-design planning process (HIDPP) splits the home interior design exercise into a 9-step process, with each step having its own purpose, pre-requisites and outcomes.
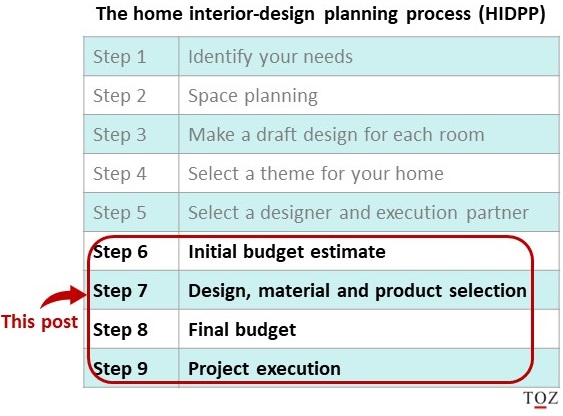
This post focuses on steps 6-9.
You can refer to the previous steps via the links below:
| Step 1 | Identifying your needs |
| Step 2-4 | Space planning, making a draft design and selecting a theme |
| Step 5 | Selecting the right interior designer |
2. Step 6 – Creating an initial budget estimate
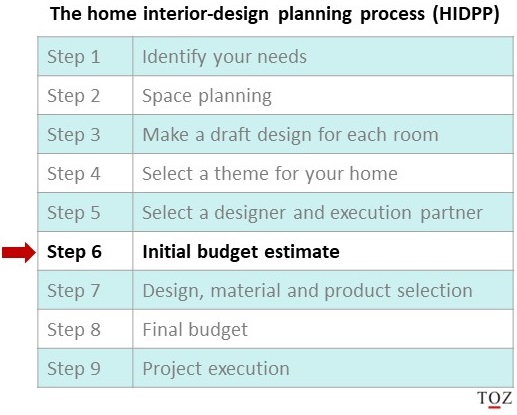
Getting your interiors done must be treated like a project – it’s an intricate exercise with several moving parts and interdependencies, where even a couple of things going wrong can lead to significant delays and additional costs.
The objective of this step is to build an overall budget for your interior-design project that includes all one-time costs before you start living there.
2.1 Prerequisites for this step
Having completed steps 1-5, you would’ve arrived at their respective outcomes:
| Step | Outcome |
|---|---|
| Step 1 | Prioritised list of your needs grouped into must-haves and nice-to-haves. |
| Step 2 | 3-4 layout options of the entire house, storage categories for each room. |
| Step 3 | – Draft design of each furniture piece based on key considerations. – Shortlist of model numbers of appliances, electrical fittings, sanitaryware and other hardware. |
| Step 4 | – A shortlist of themes you would like your home to have. – Colours/finishes/artistic designs you definitely would like to have (or avoid) in your home. |
| Step 5 | 2-3 design and execution partners with their respective quotes/proposals. |
A lot of people make the mistake of ignoring expenses that come over and above what you spend on your design and execution partners, and get a big surprise later as their costs shoot up. These include cost of appliances, ready-made furniture, home-décor, utility items and one time setup costs like cooking gas, TV, broadband etc. They might seem like small expenses, but are collectively quite significant.
The more detailed you make your budget estimate, the lesser are your chances of overshooting your budget.
Personal experience:
When we were about to start planning our home interiors, I’d assumed that the designer’s costs would make up 80-90% of my overall expense. By the time we were done planning, and I had listed all the additional costs, the number was down to 63%. Expenses like wall clocks, cutlery, soap dispensers, garbage bins, shower curtains, appliances, broadband and TV installation seem minor individually, but they all add up, and before you even realise it, you would have gone significantly over your budget.
The budget estimate will definitely not be accurate at this point. What’s important is, that you cover all categories of costs (even if some of them are zero at this point), that you can refine subsequently.
2.2 Interior design budget categories
The overall budget should cover atleast the following 5 categories. You can further sub-divide them in any way that you find convenient.
- Designer and partner expenses – This includes everything delivered by the designer and partners such as wardrobes, kitchen cabinets etc. A detailed itemised listing is ideal.
- Purchases made directly by you – These are items that you may purchase with or without the designer’s input. For example,
- Furniture – Sofa, dining table, chairs, coffee table, chairs.
- Furnishings and decorative items – curtains, cushions, mattress, pillows, paintings, flower vase.
- Utility items – dustbin, clothes dryer, ladder (always keep one at home), kitchen utensils.
- Appliances – Refrigerator, TV, home theatre, microwave, etc.
- One-time setup costs – Broadband, cooking gas, satellite TV connection, etc.
- Buffer – To account for potential cost-overruns.
2.2.1 Buffer – A key element in your budget estimate
When it comes to such big-ticket expenditures, a buffer is a very critical element to have in your budget to account for unplanned expenses, variabilities and factors beyond your control. Here are some factors that could lead to a cost-overrun:
- Additional civil work – For example, you may discover water leakages in your house that you need to fix.
- Dependency cost – There may be some pre-conditions to a product installation; a 15A plug-point, a specific height of a product installation needing additional fittings, a decorative lamp may need some special wiring/adapter.
- Something new that you may like – You may discover something new midway through execution that makes complete sense to buy (don’t underestimate the possibility of this one).
- Post installation decisions – For example, you may want to replace the old tap after installing a new basin.
- Something you missed in your planning process.
Always include a minimum buffer of 20% for potential cost-overruns.
At this point, if the budget estimate exceeds what you can spend, you might be tempted to completely cut out some items from your project. Don’t do that as yet, as there may be reductions in the next step when you finalise your design and appliance list. Optimising your expenses is best done in step 8 where we build your final budget. By then, you will be aware of all opportunities of reducing costs and you can choose the ones that make most sense.
While this budget estimate will get refined as you progress further, it subconsciously sets an anchor in your mind and you will be disappointed every time there is a cost spike. So it’s imperative that you do a very thorough job at this point and make it as detailed as possible, accounting for all possible costs you can think of. In fact, I’d suggest you leave a day’s gap and then review the budget again with a fresh mind, make revisions, and proceed further only when you feel confident about it.
Output of Step 6
A detailed budget estimate with an exhaustive list of cost categories.
3. Step 7 – Final design, material and product selection
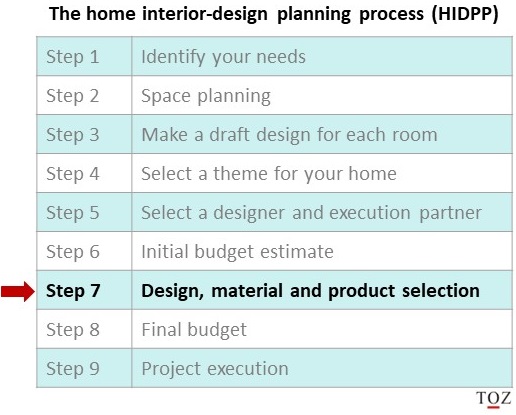
This step focuses on creating a blueprint of your house with detailed designs of everything right to the last detail. It would include:
- Finalising the layout and creating technical drawings of all furniture with exact measurements.
- Selecting building materials, coatings, finishes and accessories for different furniture items.
- Selecting granite, quartz, tiles, paints, wallpapers, colours.
- Finalising model numbers of appliances and getting quotes.
- Selecting lighting, electrical fixtures, plumbing, sanitary ware and other hardware.
- Finalising on home decor items to be purchased.
This step is not about making purchases, it’s about finalising everything to the last detail.
Without the preparation of the previous steps, this step can be the most tedious, frustrating and confusing step of all. However, having the outcomes of the previous steps in hand, makes this step quite easy:
- You will be clear about your needs, constraints, material options and finances.
- Your designer would be able to give you designs / ideas / options / inputs that suit your taste and not flood you with too many options.
- You’d be easily able to assess options, eliminate infeasible ones and finalise on the optimal choice.
- Align with your designer on all the above details and allow him/her to create the final technical designs with necessary specifications.
- With accurate drawings in place, you would be better positioned to finalise on appliance models from the shortlist you created earlier in step 3, where you made a draft design for each room.
While it’s good to create extra storage space for future needs, too much of extra space can encourage hoarding. So try to strike a balance there. You can always get a new cupboard later if you run out of storage space.
3.1 Material selection for furniture surfaces
Some tips to keep in mind when selecting materials for different furniture surfaces:
- Flat surfaces in the 2-4 feet height range, such as table tops and cupboard tops, are high usage surfaces and are prone to scratches. For such surfaces, opt for scratch resistant materials like laminate, corian, quartz, granite. Veneer and duco paint have great visual appeal, but get scratched easily.
- While veneer and duco get scratch easily, they are equally easy to fix. A quick repolish or touch-up makes it as good as new. You need to call a specialist to get it done though.
- Laminate is not scratch-prone and hence is a preferred material for many. However, if it does get scratched due to some sharp item (like a metal piece) brushing against it, then the entire laminate sheet needs to be replaced. This is quite expensive compared to polishing or touching-up a surface.
- When it comes to vertical surfaces like kitchen, cupboard or wardrobe shutters, there are plenty of options, of which laminate, polygloss, acrylic, lacquer, duco and veneer are the most common. Barring laminate, all the others scratch easily. PU (polyurethane) is a transparent material that is generally used as a protective and waterproof layer on top of other coatings.
If someone tells you that you that a surface material is scratch resistant, but you still need to use a soft moist cloth to clean it, he/she is bluffing. The surface definitely scratches easily.
- Laminate comes in sheets of different thicknesses ranging from 0.8 mm to 1.5 mm. 1 mm thickness is the most common while 1.25 mm and 1.5 mm fall in the premium segment. Avoid using 0.8 mm thickness laminates as they don’t stick evenly on a surface and tend to form bubbles. These undulations on the surface are ugly and become easily visible when light falls on it.
- Scratches are more easily visible on a glossy-finished surface than a matt-finished one. This is true even for laminates.
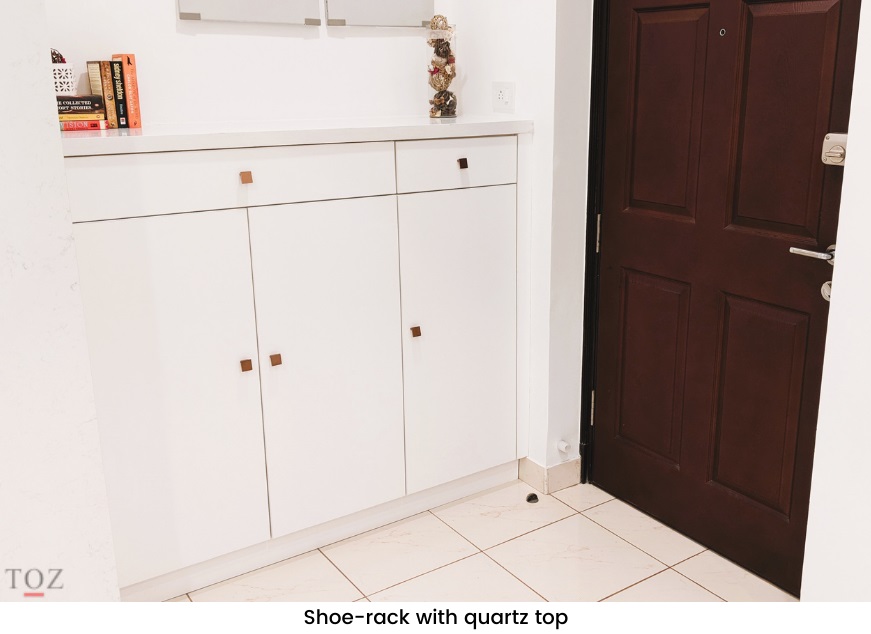
Personal experience:
When we were getting our home interiors done, we were keen to avoid scratches on some of the heavily-used surfaces like the top of the shoe-rack and some other cupboards. So we decided to use quartz given that it is scratch-resistant. However, the challenge with quartz is that it is expensive and you need to buy an entire sheet (typically 8 x 4 feet), even though you may need only a small part of it. After some thought, we figured that we could use the rest of the sheet in the architraves of our house, as kids often tend to brush their hands along pillars and architraves. Only then did we proceed to buy the quartz. Wastage was minimised and the architraves look great.
3.2 Furniture, appliance and other product selections
For product and appliance selections, remember:
- to take quotes from atleast 2 stores apart from checking prices online.
- you could get a better price if you can buy directly from a distributor, instead of a retail store.
- a bulk purchase of several products from a single retailer can get you good discounts.
Offline prices can beat online ones. In fact, it’s becoming increasingly common these days. Service levels of offline stores are also better in most cases, especially in case of defects and returns.
Given below is a list of topics you had referred to in step 3 when building your draft design. Each post is a detailed guide that talks about one or more of the following aspects:
- what to keep in mind when designing a room or particular piece of furniture.
- the pros and cons of different materials, finishings and coatings.
- make vs buy decisions – buying readymade furniture or getting it custom-made.
- selecting home appliances – which features are crucial and which ones are just marketing gimmicks.
- selecting electrical fittings, sanitaryware and other hardware for your house.
As I write posts on each of these topics, I will update the links here.
Design and material considerations for cabinets, drawers, shutters, countertop, splashback, fittings, sink and lighting. It also details out a structured approach to designing your kitchen.
A deep dive into each of these products, the options available and key factors to consider when selecting them.
A comparison of all these products and how to figure out which one is best suited for you. Also includes a buying guide for microwave ovens.
9 factors to consider when buying one.
Build material options, pros and cons of different types of shutters, designing wardrobe internals, buying readymade versus getting it custom-made.
6 aspects to consider when designing a bed or selecting one from a store.
Types of mattresses, 9 factors to keep in mind when selecting a mattress, some pointers on maintaining your mattress for better longevity.
This post would be useful if you’re looking for a quiet fan (say, for working from home and taking calls). The post also guides you on how to select such a fan that also consumes less power.
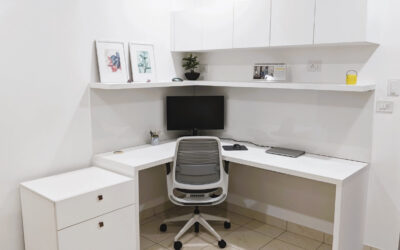
8 aspects to consider when setting up a home office, such as the right chair, table, footrest, electrical points, lighting, storage and computer setup.
An about an objective approach to home lighting design in terms of understanding lighting layers, wattages, design techniques, efficiency and smart lighting.
A look at different washing machines designs, their pros and cons and what factors and features to keep an eye out for, when selecting one.
- Designing a convenient bathroom
- Designing balconies
- Curtains and blinds
- Wallpaint vs Wallpaper
Once you are done with the final design, draw the outlines of the furniture (wardrobes, cupboards, shoe-rack, crockery unit, side-board, sofa, etc.) on the walls using a pencil or some marker. It’s one thing to see layout diagrams, 2D and 3D computer visualisations; but when you draw it as per real dimensions on the wall, you will get a better feel of what a furniture piece of that size would feel like in real life. Even changing the dimensions by a couple of inches can take it from looking bulky/tiny to just right. This is your last chance to make any such minor changes, as making changes during execution can be expensive.
Output of Step 7
A blueprint of your house with detailed specifications of everything right to the last detail, including technical drawings, materials, coatings, colours, hardware, lighting, sanitaryware, fixtures, home décor and appliance model numbers.
4. Step 8 – Final budget
In this step, we do a final iteration on the interior design budget before proceeding into execution.
Revisit the initial budget estimate you prepared in step 6 and update it to incorporate any changes you have made in the previous step.
4.1 Exceeded your budget? Some solutions.
If you have gone over-budget, here are some options you could consider to reduce your costs:
- You might be tempted to completely remove certain items, but don’t do that right away. You need to choose between not having a product at all versus having something cheaper that has a shorter life or limited features. This is where the prioritisation exercise you completed in step 1 (identifying your needs) becomes relevant again. For each item you want to consider dropping off, tie back to the priority of the need it is serving. If it’s a high-priority must-have, you could consider spending less on it instead of getting rid of it completely.
- Readymade furniture is generally cheaper than custom-made furniture. Check if you could buy some readymade furniture items directly from a store instead of getting them custom-made. If the design is not too customised, chances are you will find a similar one in a store at a much better price.
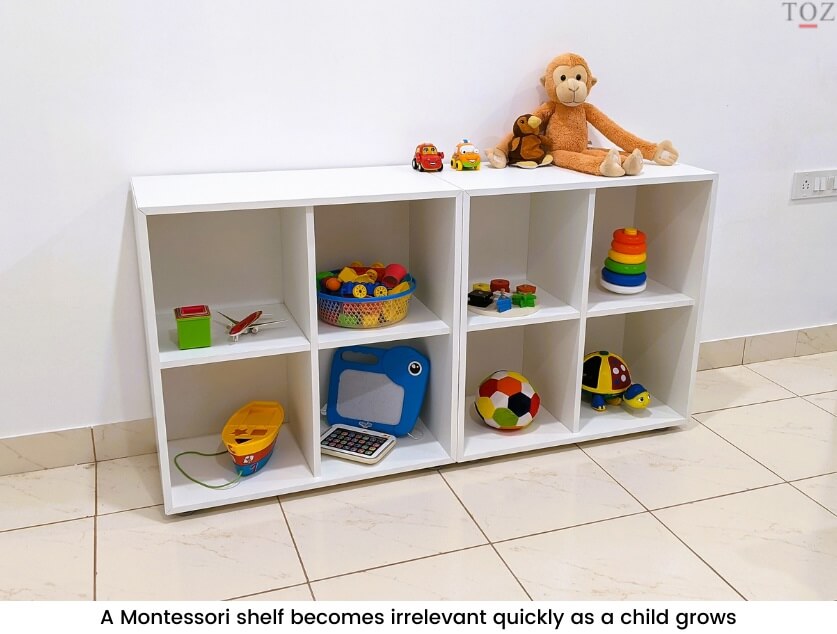
- For furniture that you will need only for short time (say, a couple of years), you can opt for readymade furniture made of MDF or even particle board. This is generally true for kid’s furniture items.
- Opt for the next best option for build material if it isn’t a major compromise. For example, instead of buying a plywood table, you could go for one made of MDF. It won’t last as long, but atleast your need is served.
- For low usage items, check if you can opt for cheaper build materials with good finishing. For example, opting for a particle board corner table instead of a wooden one.
- Appliances are generally high-usage items, so I generally don’t recommend compromising on them. However, if the second-best choice isn’t much of a compromise, you could consider it.
- Don’t underestimate the second-hand furniture market; you’ll be surprised at the impeccable quality and condition of some of the things people sell. You could spend a little to refurbish/repolish it (if at all), and it would become as good as new. Second hand furniture also makes sense for items that will be needed only for a limited time (say a few months or a couple of years).
You don’t need to buy all furniture and decor in one go:
- Keep some open spaces, so you have the opportunity of buying something interesting you may come across a few months later.
- It is sometimes difficult to decide on some items prior to moving into your new house and getting a feel of actually living in it. In such cases, you could postpone the decision and take a call few months after moving in.
- Postpone some purchases for future if you don’t see an immediate need for them. For instance, you can postpone buying your kid’s study table, if he/she has another 6 months to go before using it.
Once you are ok with the final budget, you can proceed into execution.
Output of Step 8
Final budget of the of your home interior design project, updated detailed designs and finalised product purchase list with model numbers.
5. Step 9 – Project execution

Many people are too tired by the time they reach project execution and leave it to their designers and execution partners to manage it.
Project execution is where a lot of cost deviations occur and often poor execution-planning is the culprit.
Unfortunately, the execution plans of most designers are very inefficient. They prefer doing everything in sequence as it requires lesser co-ordination effort, leading to the execution running into several months, which in turn costs you more in terms of additional rental and other expenses.
5.1 Some pointers on the execution plan
An efficient execution plan is crucial to ensuring minimal cost-overruns. You must review your designer’s execution plan in detail keeping some of the following pointers in mind:
- Structural tasks that generate lot of debris must be completed first (civil, plumbing, fixing floor and wall tiles).
- Electrical wiring work can generate a lot of debris, especially if you are getting additional plug points, moving switch boards or installing smart home components, as these activities require chipping the walls.
- This must be followed by tasks that generate lesser debris (countertops, woodwork and stone fittings). Granite/quartz installation may require a small amount of shaving/polishing onsite to ensure a perfect fit. The polishing generates a lot of fine dust that gradually settles all over the house.
- Installing the most delicate items must be planned at the end (mirrors, home décor, electronics). Poor sequencing can lead to damages, delays and additional costs.
- Try to club noise generating activities together to minimise the number of days your neighbours are disturbed by noise. Inform them of your schedule in advance.
Check with your apartment society, community or resident association for guidelines and rules regarding getting interiors done. In some apartment complexes, you need a written approval to make any structural changes like breaking walls or changing floor tiles.
- Identify all dependencies with external partners and contractors, taking into account the lead time and pre-requisites needed for them to start executing their part.
- Plan installation of appliances in a way that their executives can arrive at the right time to provide pre-requisites for installation. In some cases, the product warranty is not valid if the installation pre-requisites are not met. This is particularly relevant for products like chimneys, hobs, certain lights and other fixed equipment.
- Don’t miss any opportunities of implementing tasks in parallel. For instance, woodwork in one room could be done in parallel with fixing windows in another.
- The plan should indicate when you would need utility companies to complete their installation (e.g. piped gas, broadband, satellite TV).
Personal experience:
Covering the floor before starting work is crucial.
A lot of debris (containing sand, stones, cement) is generated during execution – be it civil work (like wall modifications), fixing a false ceiling or even chipping walls for electrical wiring. These debris can cause scratches on your tiles due to anyone walking over them, moving equipment or furniture. The big scratches are ugly and easily visible. Replacing tiles is expensive.
But it’s the smaller scratches that are a bigger problem. Once you start living at home, everyday dirt will get stuck in the tiny grooves on the tile surface making it quite unsightly. Regular mopping does not help and you will have to get it deep-cleaned every now and then, which is expensive. Many people prefer the feel of ceramic tiles, but keep in mind that they are more prone to scratches than vitrified tiles. So a small step of covering the tiles can save you money and hassle in the long run. I learnt this from one of the apartments where we used to live on rent earlier.
5.2 Sequencing tasks in the execution plan
Here are some guidelines to give you an idea around sequencing execution tasks. This is not cast in stone; you can change it as per your project needs. Some tasks within the same step can be done in parallel; this should be planned by taking inputs from the respective partners and service providers.
- Step 1 – (tasks that generate the most noise and debris)
- Civil and plumbing work (AC provisioning, changing tiles, wall modifications, etc)
- Floor tiling work (if any)
- Electrical points (get as many plug points as possible; trust me, you will need them)
- False ceiling (if any)
- Cooking gas piping installation (especially if you have piped-gas)
- Plumbing changes (if any)
- Broadband
- Wired (try to get a wired connection for your workspace, wired connections are any day more reliable than Wi-Fi)
- Internet routers (identify the points that may need wiring, test Wi-Fi coverage throughout the house)
- Satellite TV connection (sometimes the cable itself needs replacement)
- Wall hacking
- Wall tiles (dado tiles) in kitchen (if applicable)
- Step 2
- Anything that has granite/quartz (Kitchen counter top, bathroom basin, kitchen and utility sinks).
- Frame for sliding windows (if applicable)
- Preparing walls for wallpaper / wall-paint (putty and primer)
- Step 3
- Fixed appliance installation (chimney, geysers, air-conditioner)
- Electrical fixtures (fans and lights)
- Cupboard carcass
- Kitchen cabinets carcass and drawers
- Sliding windows
- Bathroom accessories
- Base coat of paint
- Step 4
- Shutters for wardrobes, kitchen and cupboards
- Mirrors
- Wall-accessories
- Appliance installation – water purifier, washing machine, dishwasher
- Wallpaper, final coat of paint
- Curtains / blinds
- Step 5
- Sofa, dining table, chairs, coffee table
- Remaining appliances and electronics – TV, refrigerator, microwave, router
- Professional deep-cleaning
6. Conclusion
Getting the interiors of your home done is an elaborate exercise with several moving parts and interdependencies, where even a couple of things going wrong can lead to significant delays and additional costs. Hence it is critical to use systematic approach to plan the interior-design exercise itself by making sure you’ve asked the right questions, assessed your needs, identified the right partners, understood pros and cons of different options, budgeted prudently and designed your house in a way that’s optimally suited for your needs.
Have questions or queries?
If you have any questions, feel free to mention it in the comments section at the end of this page; I will do my best to answer them. Please allow a few days for me to respond. If I (or any other reader) can answer it, then good. If not, atleast it will be something for the next reader to keep in mind. In case you have any learnings or experience to share, do mention it there for the benefit of other readers.
Share this post:


0 Comments